Today we are going to test the CR Falcon from Creality which is their engraver / laser cutter. We know Creality mainly for its 3D printers, but there is a little change and it is clearly trying to attack other market segments with complementary products. As with this machine which exists in 2 different laser powers, the 5W and the 10W, which we will test here.
Unboxing
Already in the box, we will find the documentation, the front and rear profiles. We have the protection glasses, the feet with the screws and the tools of assembly. We have the power supply, 2 small plywood boards to test the machine. We find the cover of the laser with the laser 24V which has an optical power of 10W. And finally, the left and right profiles, as well as all the support of the X axis pre-wired with the motherboard connected. I would already note that there is no USB C cable to use the machine connected to a PC, which is one of the most common uses.
Assembly
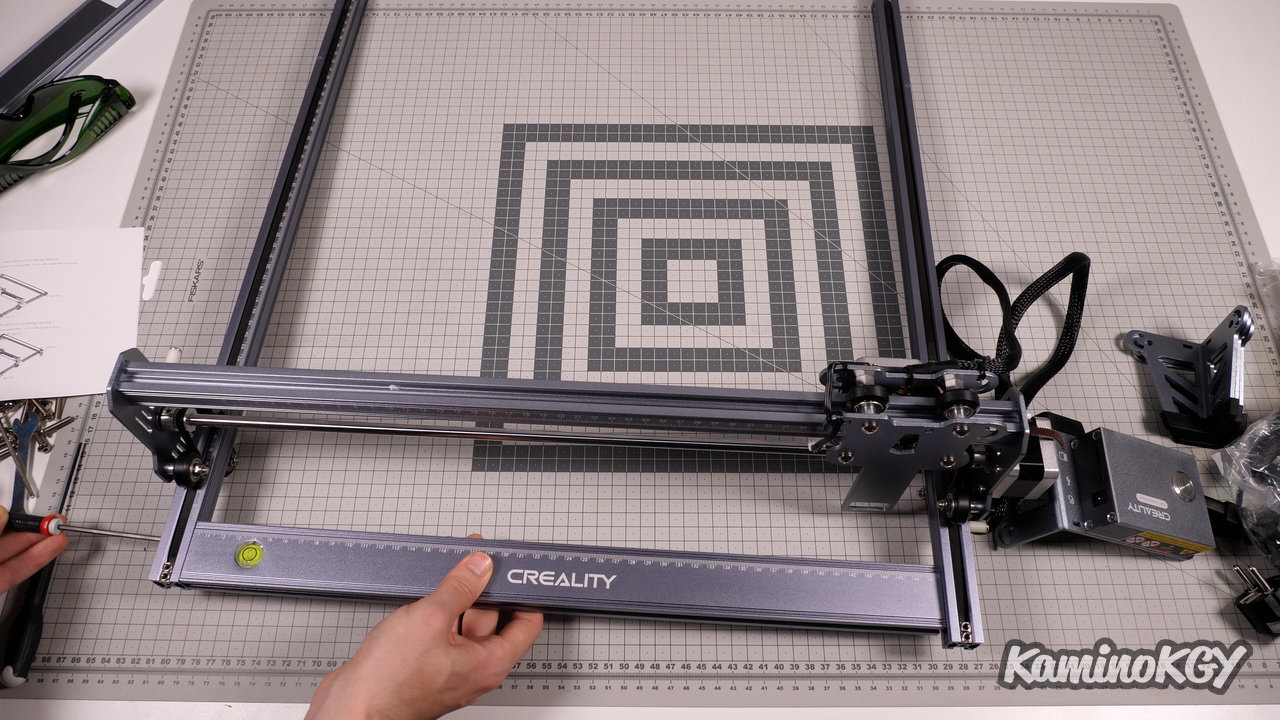
Assembly is simple. Just slide the left and right profiles. Insert the belts at the level of the sprockets, tighten them from the back and hold them in position with T-nuts that have a small tightening screw inside. We screw the front and rear profile. Then we finish with the feet that are all around, with the motherboard on the front right corner. We slide the laser on its place and we plug it. The good thing is that you don't have to do much cable management, but I find the tensioning of the belts a bit tedious. If you don't decide to adjust it from the front as well as the back. But fortunately, you probably only have to do it once or rarely.
Features
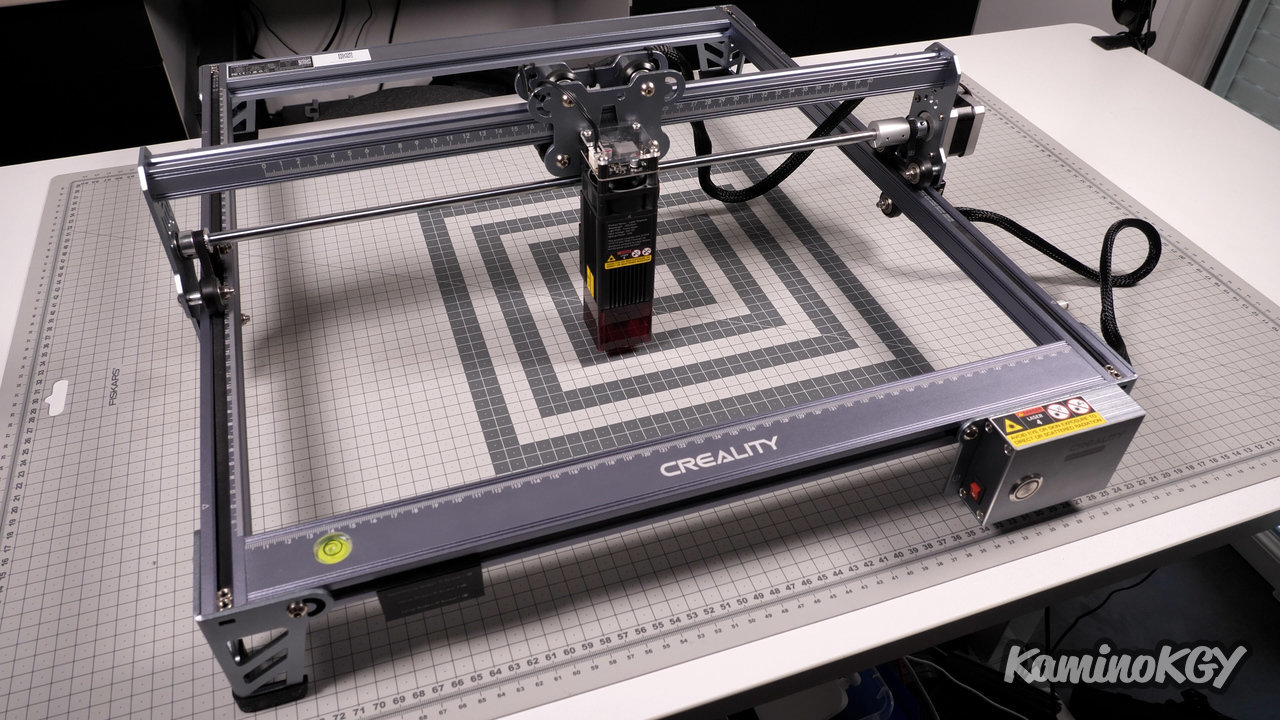
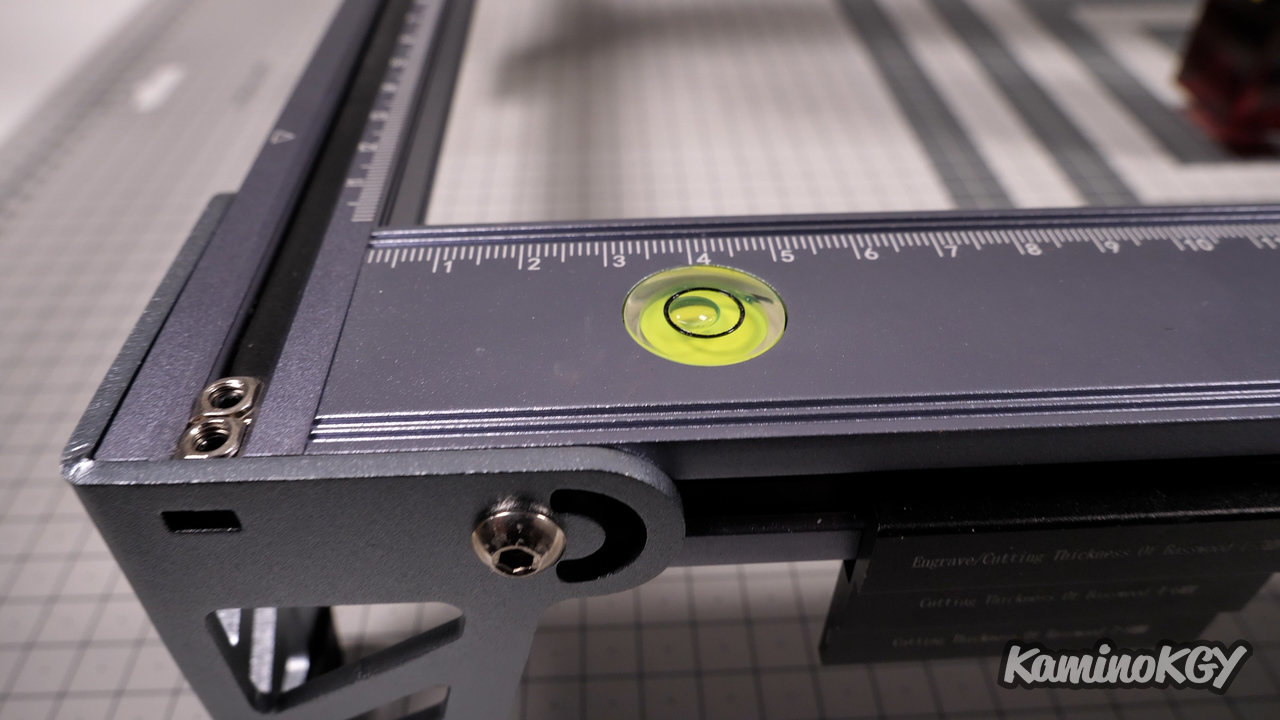
Regarding the characteristics of the machine, we have a working surface of 400 by 415 mm. The laser of our version has an optical power of 10W. We have a small level with a bubble that is integrated to the structure. It is possible to make an autohome which allows to have a starting point always identical. This is very useful when you want to have a reference between several engravings or cuts.
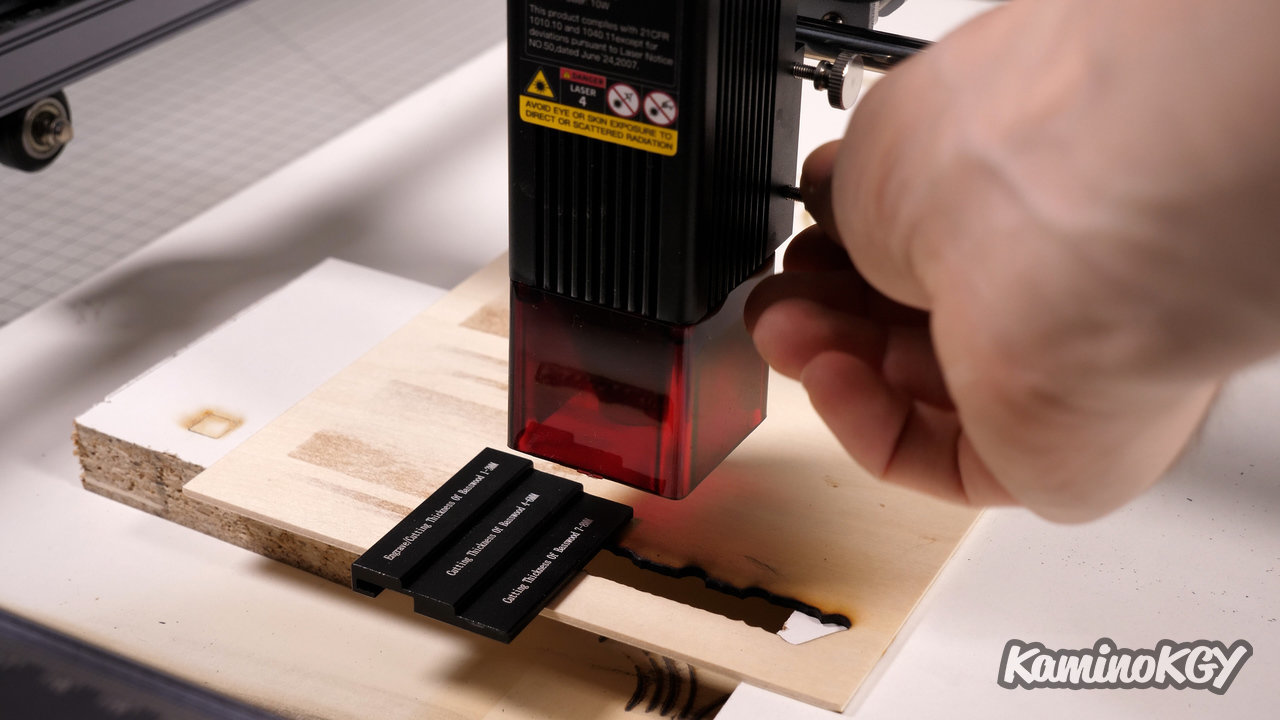
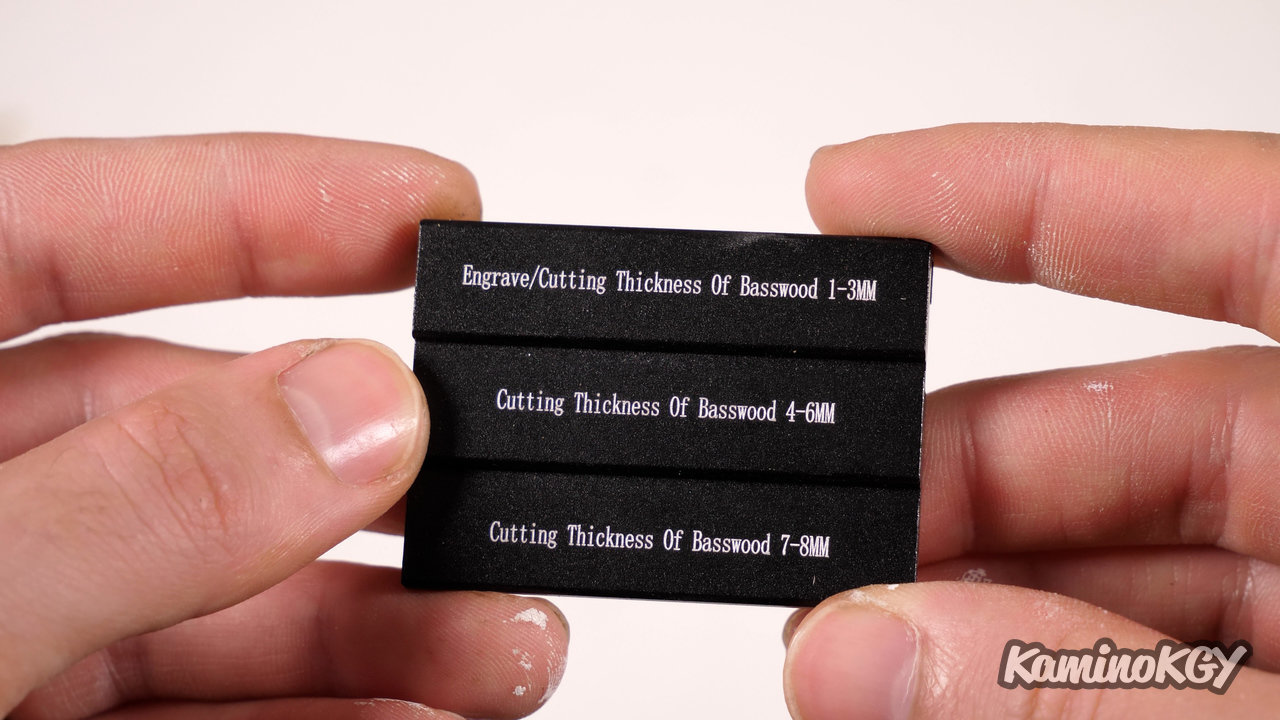
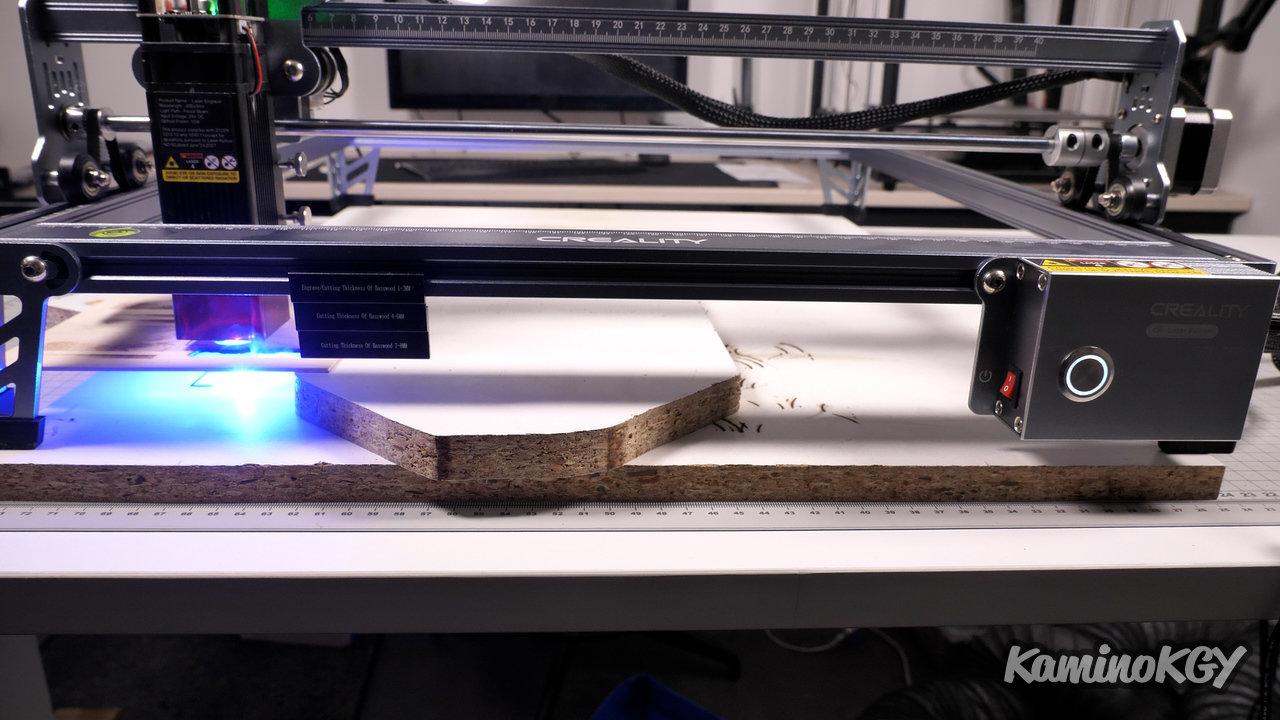
For the leveling of the laser, it is quite simple. We have a small plate with several levels depending on what we want to do. The furthest level is for engraving and cutting wood between 1 and 3 mm thick, then at the intermediate level we have the cutting of wood between 4 and 6 mm thick, and finally, the thinnest level, therefore closer to the support to be cut, we have the cutting for the height of wood between 7 and 8 mm. By doing this, we just try to bring the laser closer. So we can have a focus that is as far as possible in the material, even if we lose the focus at short distance. It will be deeper in the material which will allow to pass more easily through, to the other side.
About the safety elements, the machine cuts itself off as soon as it is moved, thanks to an integrated gyroscope. There is a removable protective cover and safety glasses. There is no really visible emergency stop button. It will probably be necessary to cut directly the general power supply, if one wants to be sure that it stops immediately.
Test engravings
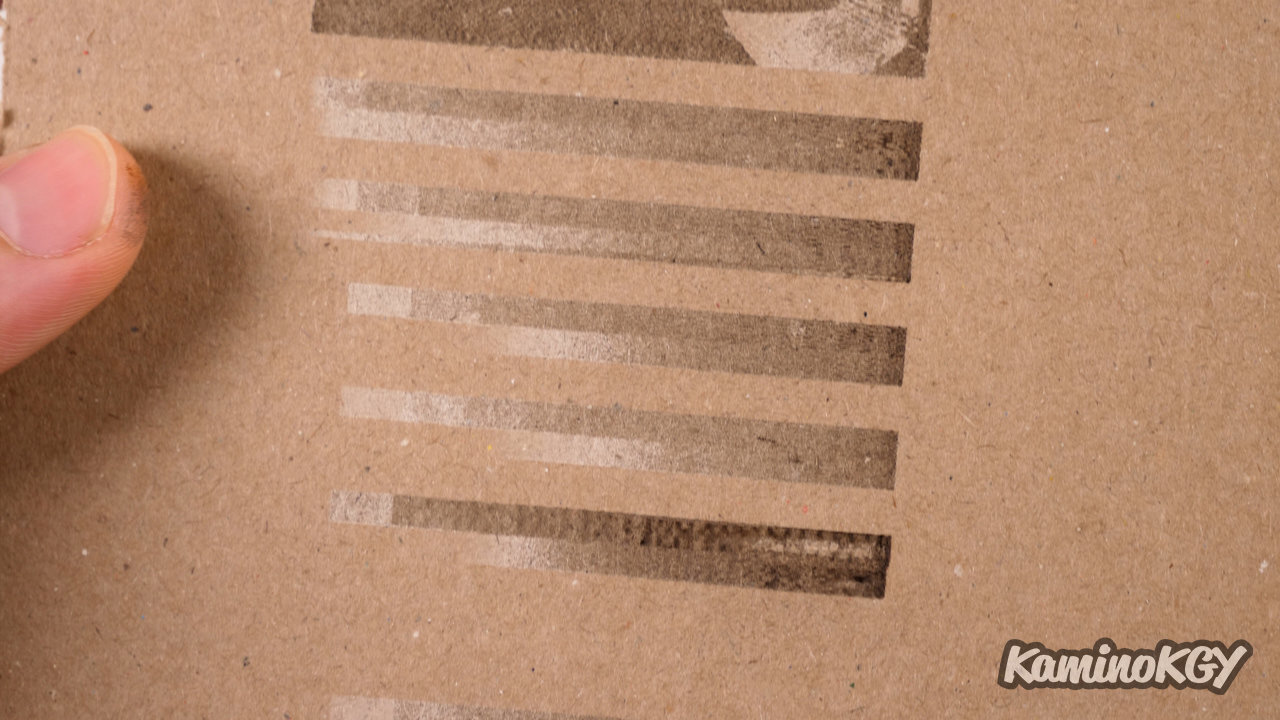
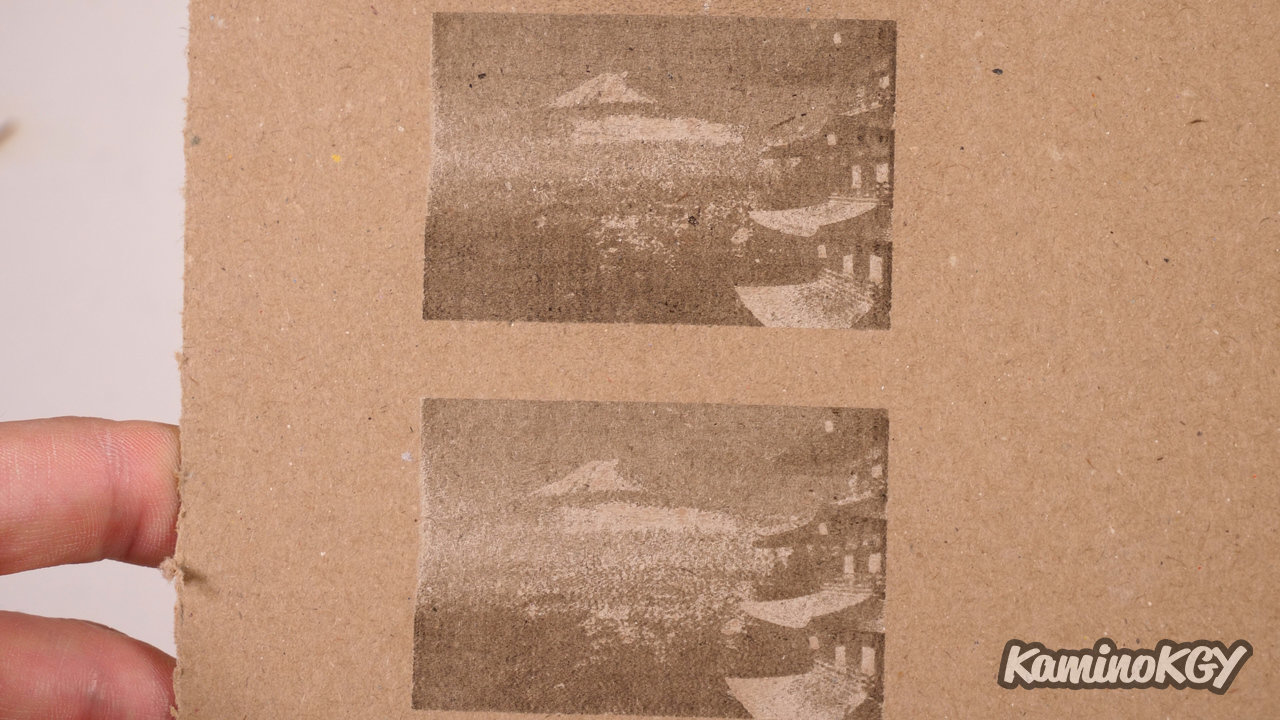
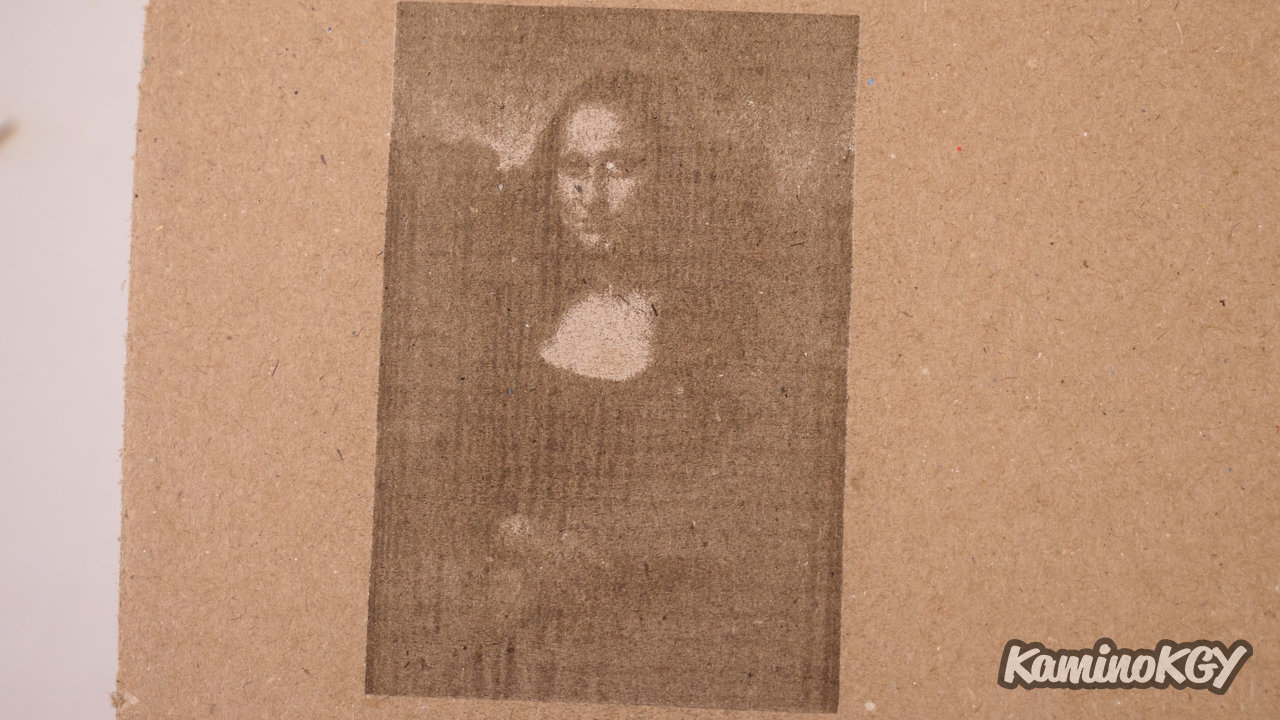
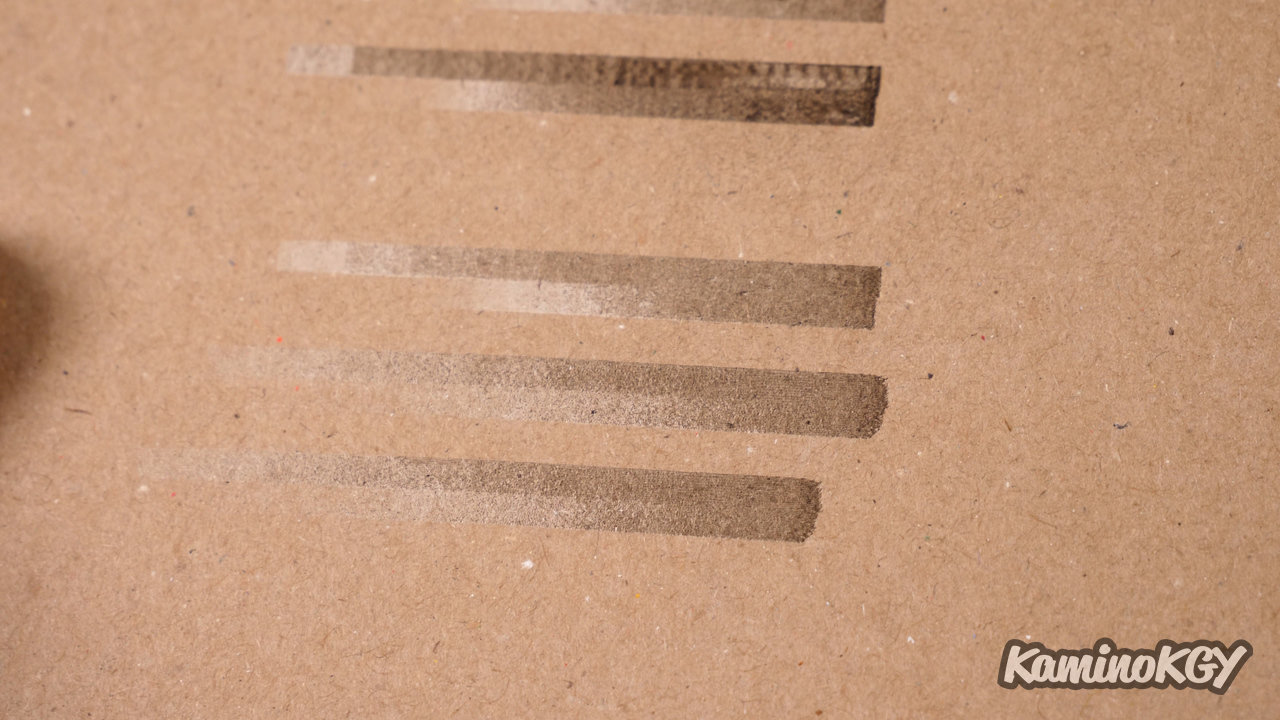
If we start with engravings on cardboard, we have rather clean gradations, some are less straight on the side, as the cardboard was taped it is perhaps due to the fact that the laser does not stop neatly, but continues its course a little before starting again in the other direction. I made a first engraving of mount Fuji in line by line mode which comes out not too bad, even if we see a white rounded area on the left part of mount Fuji. As the laser should be on the left side, there should be no room for it to slow down. On the second Mount Fuji, I tried to play a bit with the brightness and contrast settings on LaserGRBL, to bring out the details on the Mount. I think that they are indeed more visible, even if the foreground was darkened. I had kept these settings on the Mona Lisa, but you can see that the details in the darker colors have been totally obscured.
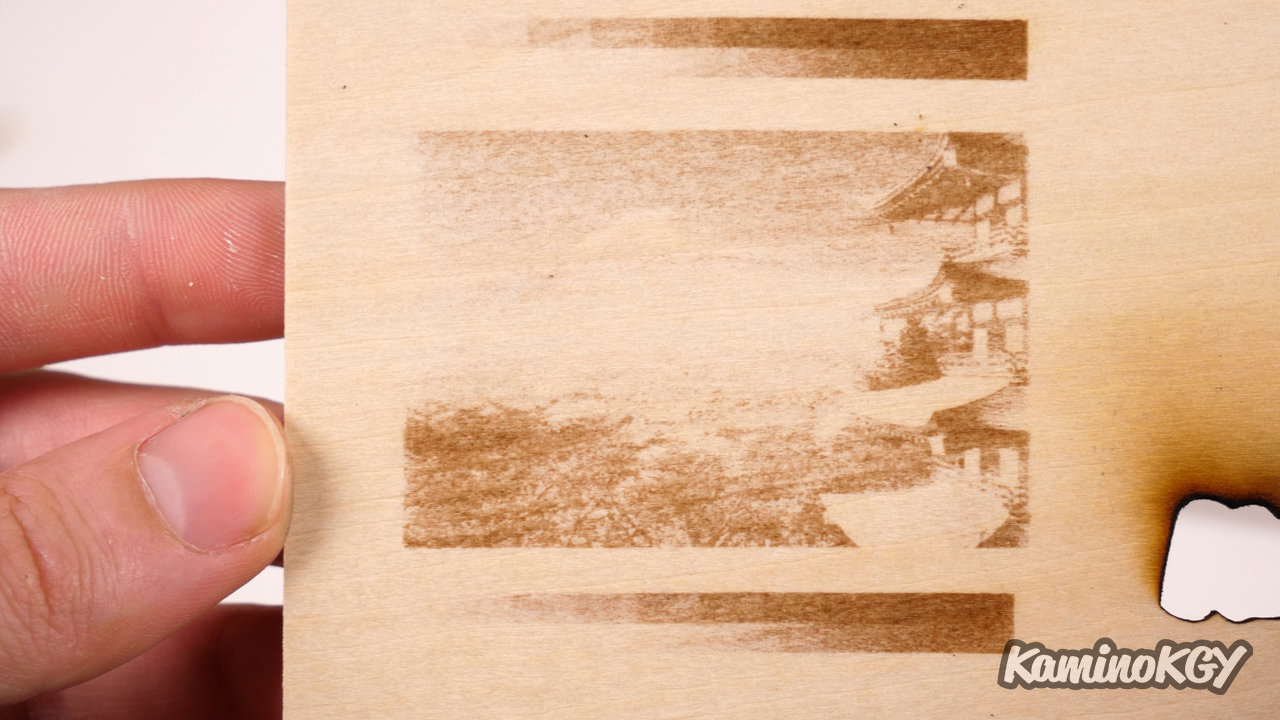
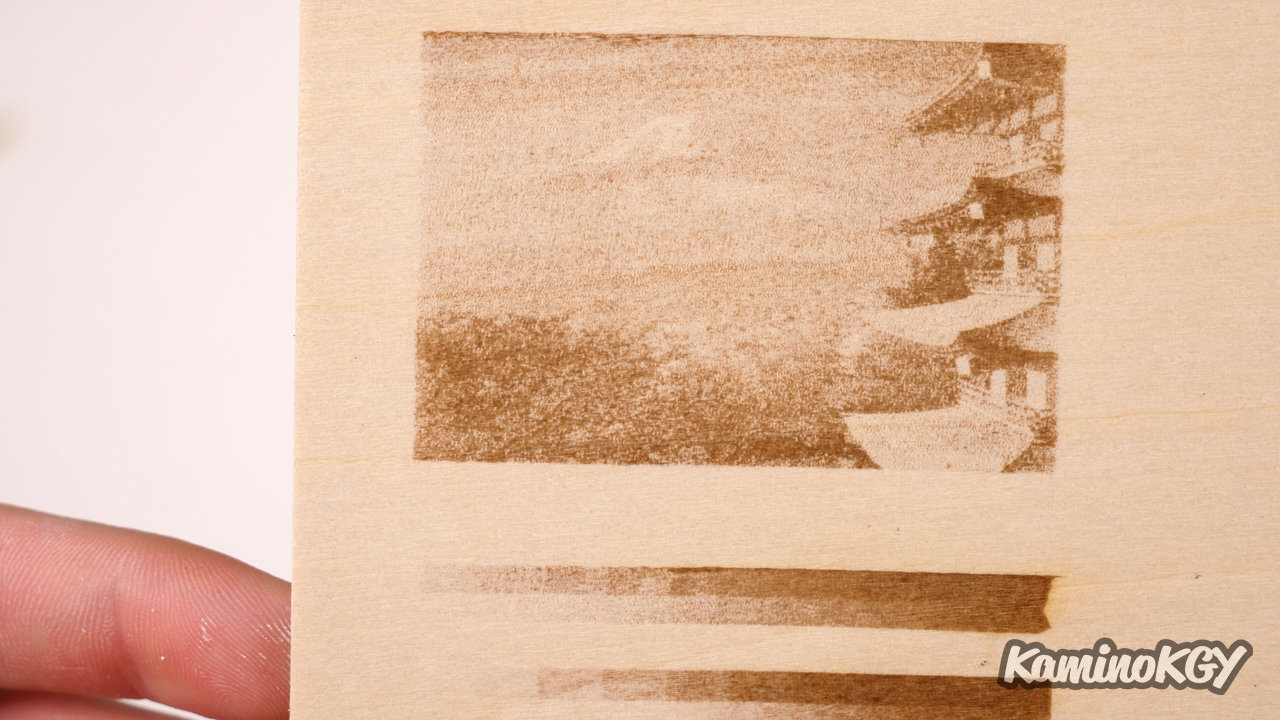
Then, on plywood, the gradations are well graded, almost too much on the well-defined areas of the top line. But the texture of the wood obviously means that you can't get a sharp point with a laser beam in one place. On the first Mont Fuji print, we don't actually have a Mount. It is totally invisible, hidden in the light colors of the image. The second one comes out better with different parameters, but of course, it is not very accurate.
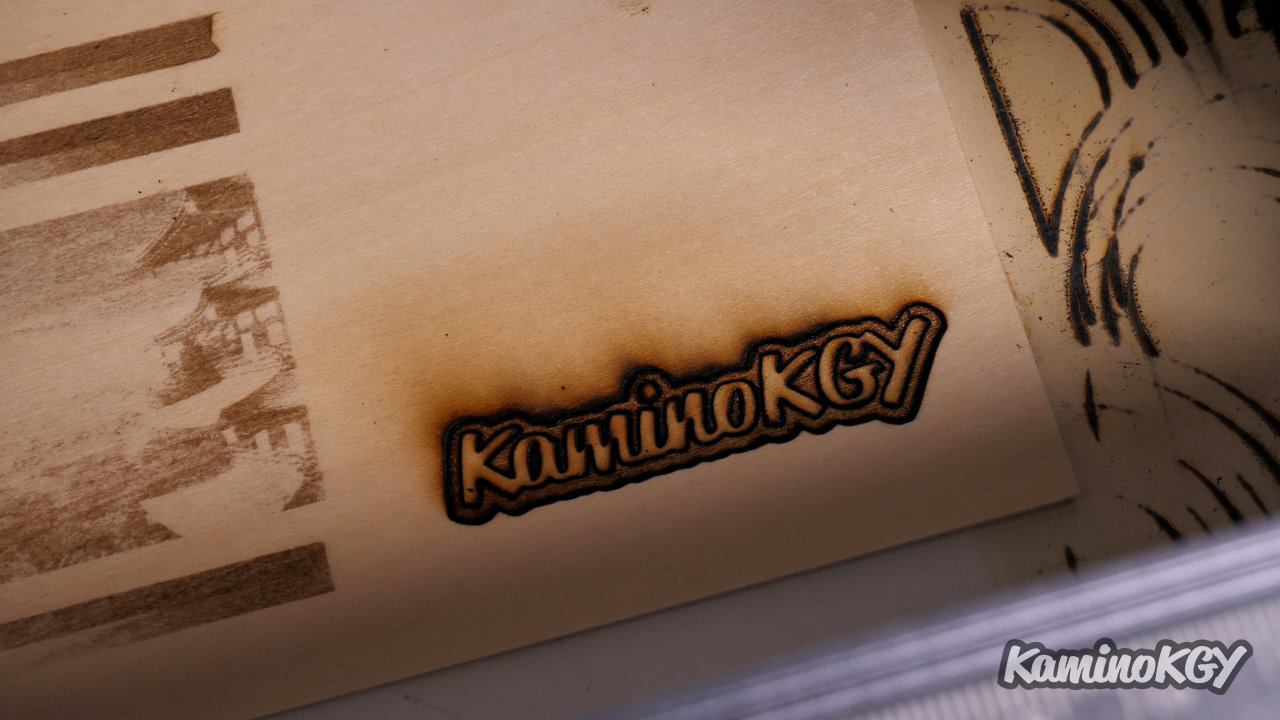
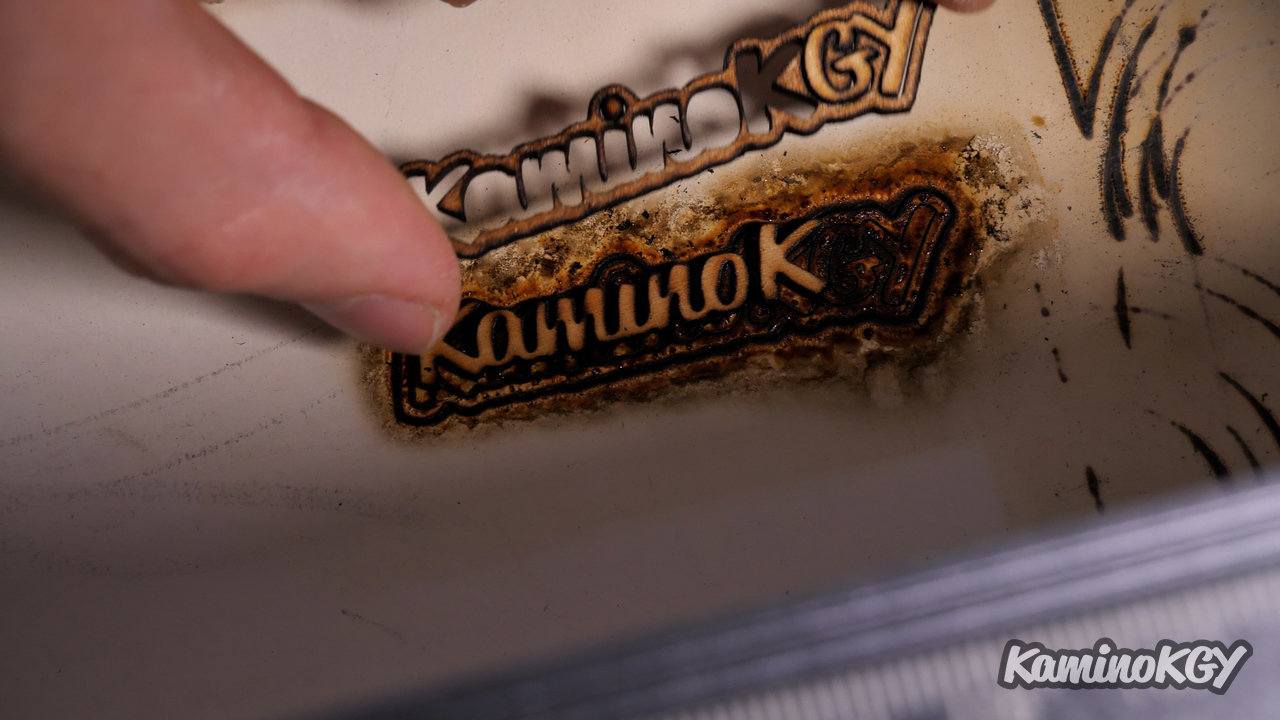
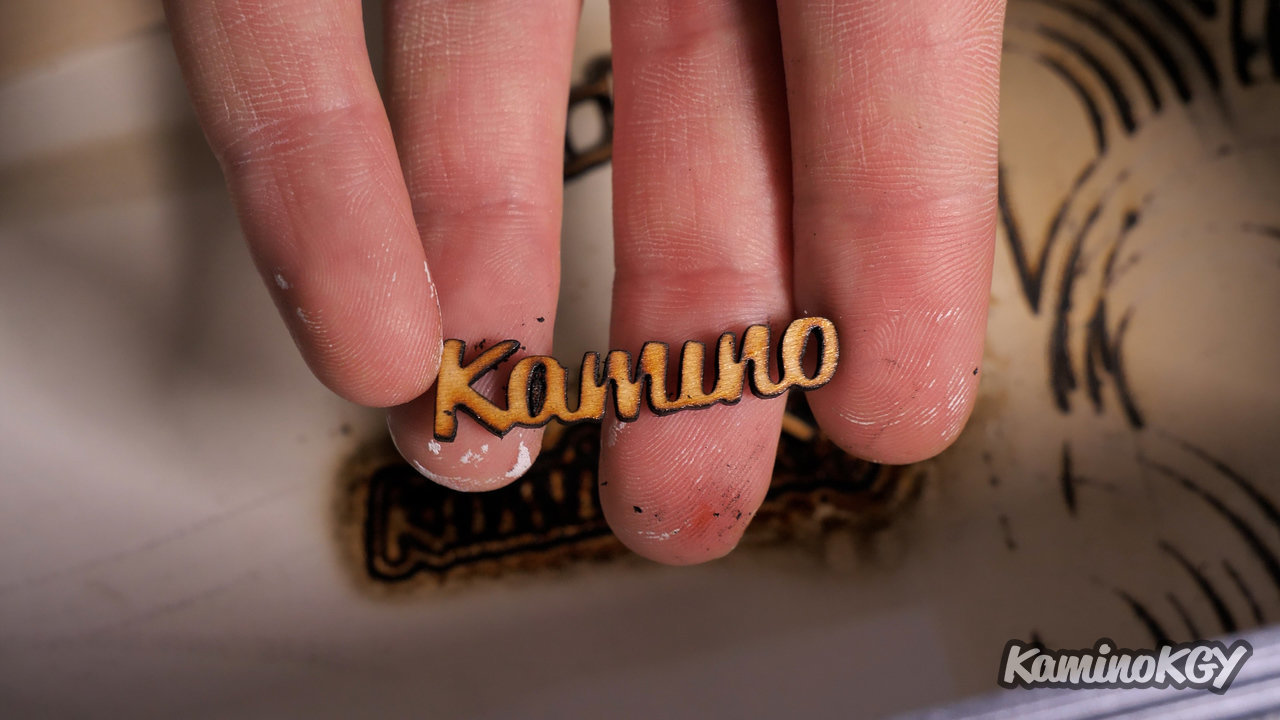
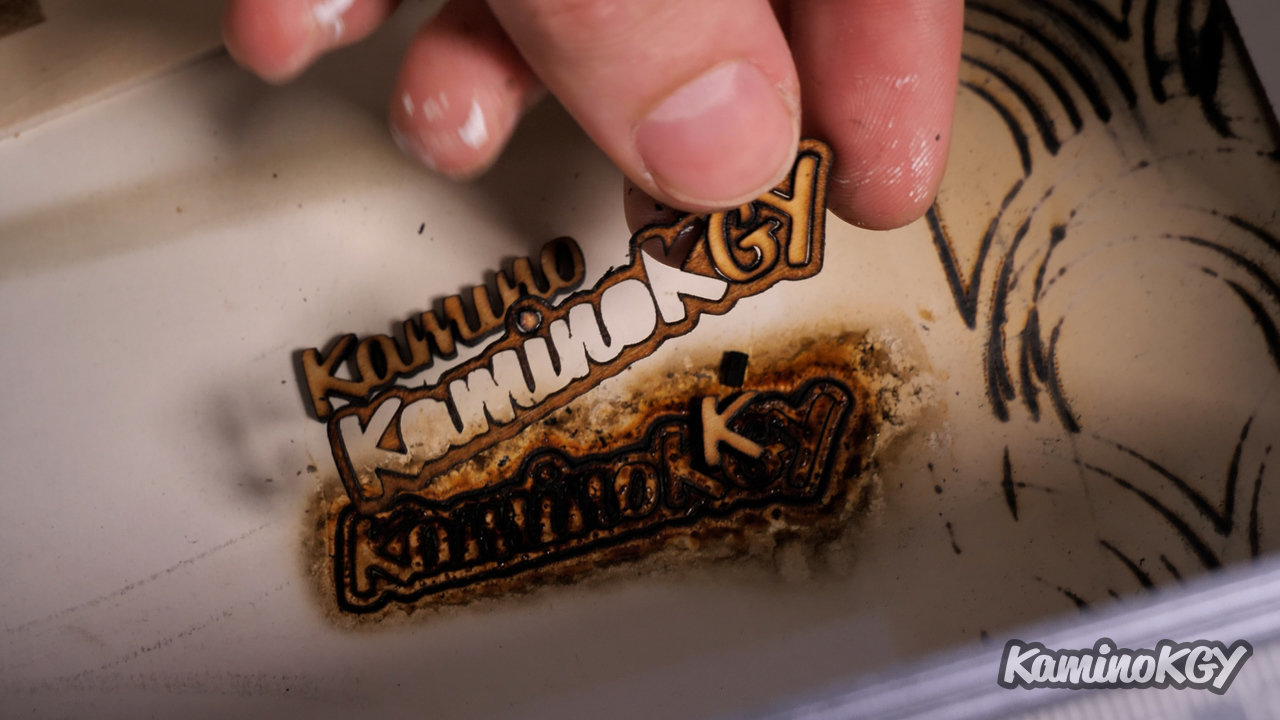
On the right side I wanted to engrave a KaminoKGY, but I think I didn't pay attention to the engraving speed and the associated power present on LaserGRBL with the constant power laser. This made the boundary line that was supposed to outline the letters cut through the plywood. And the cut on the outer contour to detach the KaminoKGY just dug the protective backing underneath even more.
To summarize
I think the engravings could be more accurate. I have to say that I expected a little better from Creality who must have spent some time researching the issue and trying to stand out, although it is also the fact that I have now tested several engravers and laser cutters. I'm probably starting to be more and more critical and demanding.
But the fact of starting with a 10W laser probably does not help to have a precise result unlike the 5W version which would allow to have more shades of gray on the same level of optical power and engraving speed. Especially with the 10W version as we have little room for maneuver on the laser at low intensity, we are somewhat obliged to play on the speed, which still seems to have an impact on the quality of the engravings.
Also note that the 5W has a cover at the laser beam that incorporates an air filtration system, which is not the case for the 10W version. And a small rod on the side that allows you to focus the laser.
Then, I would have liked to have a screen to choose the gcode to launch rather than just the last one placed on the microSD card, even if it's already better than other machines that don't even allow to do that. After that, it would have been an extra cost for the machine, which doesn't seem to want to be on the high end with a structure with profiles that remain quite simple.
Bye bye!